The popularity of running as a leisure pursuit has increased throughout the past 25 years, reflecting social trends away from organised team sports and towards less time-consuming, more flexible and independent ways of keeping fit and active.
Over the same time period, there has been an explosion in sports science and sports injury research and therapeutic practice. Among other things this has produced a wealth of advice on baseline fitness and training for running, and huge advances in footwear technology.
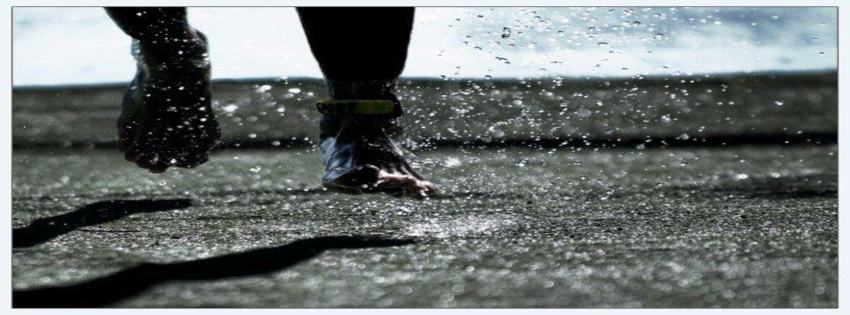
Yet despite all this, runners keep on injuring themselves. They continue to seek treatment, typically, for Achilles tendinosis, patellofemoral pain, repetitive calf muscle strains, big toe pain and low back pain – and it seems to those of us who have been around the sports therapy world for a while that the incidence of running injuries has not reduced significantly. Is it time to return to the fundamentals of running to find out why so many people are still hurting themselves?
Coaches, trainers, therapists and athletes have no difficulty agreeing that technique has an important role to play in leisure pursuits such as rowing, golf, swimming and ballet, but when I ask my running patients about their technique – whether, for instance, they heel-strike or land with their knees straight – I receive blank expressions. In most sports, enthusiasts will expect to devote months and even years to working on movement technique, whereas with running we tend only ever to focus on how to run faster and/or further, and how much fitter we can get as a result.
Therefore I say to you: running is practised rather than taught. This leads to the question: is there an optimal running technique that enables athletes to train without fear of injury, with a real reduction in their injury risk – and with the prospect of still being able to improve their performance?
One recently developed technique certainly lays claim to be able to do all three things. Called ‘pose running’, I describe it as ‘a graduated postural and proprioceptive approach to maximising performance and reducing injuries’.
Pose running technique was invented by Nicholas Romanov, a Russian scientist now based in Miami and consultant to the British, US and Mexican triathlon associations. During the 1970s and early 80s, Romanov was heavily involved with athlete training in Russia, where he observed that as his athletes turned up the workload, so they would start to break down physically. At that time there was little strength and conditioning training. With a heavy emphasis on improving mileage and speed, the athletes focused on increasing their cardiovascular and respiratory systems, and paid little heed to their underlying running technique.
The pose running technique
Romanov proposes one universal running technique for all runners, regardless of speed or distance: a 100m sprinter runs with the same underlying running technique as a 10km long-distance runner. The pose running technique is designed to prevent undue strain on the joints and requires a great deal of muscular endurance and resilience. The elite British triathletes Tim Don, Andrew Johns and Leanda Cave have all adopted the pose running technique under Romanov’s guidance. According to Romanov, the Ethiopian distance champion Haile Gebrselassie and the US sprint legend Michael Johnson are both examples of runners with a natural pose style – ‘born with perfect technique’.
The distinguishing characteristic of the pose running technique is that the athlete lands on the midfoot, with the supporting joints flexed at impact, and then uses the hamstring muscles to withdraw the foot from the ground, relying on gravity to propel the runner forward. This style is in clear contrast to the heelstrike method that most runners deploy and which is advocated by some health care professionals (see Fig 1).
The concept is simple enough, but the practice is extremely hard to master. It is only with expert tuition and dedicated training that the athlete can perfect the pose running technique. Running in pose is physically demanding, so runners must undertake strengthening drills before starting the programme. Maybe it is this added proprioceptive training that allows the athlete to remain injury free? As yet there is no body of research to help answer this question.
Principles
Running should be easy, effortless, smooth and flowing. We have all seen and heard the heavy runner who pounds away on a gym treadmill. Romanov says the runner is only as good as his change of support and that the runner should have a very high cadence – not a long, extended stride length. In pose running, the key is to maximise your effort in removing your support foot from the ground; good training is essential to ensure that you don’t over-stride or create excessive vertical oscillation.
The runner should fall forwards, changing support from one leg to the other by pulling the foot from the ground, allowing minimum effort and producing minimum braking to this body movement. The idea is to maximise the use of gravity to pull the runner forward.
The pose running technique is centred on the idea that a runner maintains a single pose or position, moving continually forwards in this position. Romanov uses two models to explain the rationale behind pose:
the mechanical model – the centre of gravity, which is around the hip position, should move in a horizontal line, without vertical up and down displacement;
the biological model – the rear leg maintains an ‘S-like’ form, and never straightens. This notion comes from animals such as the cheetah which do not land on their heels but run on the midfoot and deploy a pulling through action using their hamstrings rather than pushing the foot into the ground (see Fig 2).
Perhaps the most useful imagery to help with this technique is to imagine a vertical line coming from the runner’s head straight down to the ground. The raised front leg should never breach this line, but remain firmly behind it. This focuses the effort firmly on pulling the ankle up vertically under your hip rather than extending forward with your quads and hip flexors.
Pose running technique principles in summary
Raise your ankle straight up under your hip, using the hamstrings
Keep your support time short
Your support is always on the balls of your feet
Do not touch the ground with your heels
Avoid shifting weight over your toes: raise your ankle when the weight is on the ball of your foot
Keep your ankle fixed at the same angle
Keep knees bent at all times
Feet remain behind the vertical line going through your knees
Keep stride length short
Keep knees and thighs down, close together, and relaxed
Always focus on pulling the foot from the ground, not on landing
Do not point or land on the toes (see Fig 3: Toe running)
Gravity, not muscle action, controls the landing of the legs
Keep shoulder, hip and ankle in vertical alignment
Arm movement is for balance, not for force production
The power behind the pose running technique
Pose is by no means universally accepted by the running fraternity. While top athletes have sought Romanov’s help because of injuries, the method does require good scientific research to back it up. It is quite possible that many of the benefits experienced by pose athletes are the result of the rigorous strengthening programmes they undertake. You would certainly recognise in pose drills many conventional physiotherapy exercises such as eccentric Achilles tendon training; proximal pelvic control in single leg standing, and control of femoral rotation.
This focus on proprioception, together with the strong imagery of the technique, changes the physical placement of the limbs and reduces the downward displacement force of the foot on to the ground.
That said, I know of people who have tried to run in pose and have sustained injuries such as calf strains and lower back problems because they did not get their pose stance right and did not have sufficient proximal hip control.
The athlete should be committed to learning the new technique: once they have decided to learn the pose running technique, they cannot expect to chop and change between running styles as they wish. The technical drills outlined below can be very strenuous and may be harmful if attempted, for instance, at the wrong point in an injured runner’s rehabilitation phase. Therapists should adopt these drills with proper caution.
How to do it: pose drills
If you are embarking on a serious transition to pose, you should practise the drills (building up the level of difficulty) once or twice daily, three sets of 10 to 15 reps per drill. Drills should be practised for at least a week before attempting to run in pose, and should be performed before a run.
All drills should be performed barefoot for added awareness of the movements, on a forgiving surface such as grass or a running track. The drills fall into three sections:
Basic drills to reinforce the pose position, the use of the hamstring in pulling the foot from the ground and the feeling of falling forward under the effect of gravity (drills 1-7);
Intermediate drills to reinforce these feelings (drills 8 and 9);
Advanced drills to aid speed, balance, strength and reflexiveness none shown here).
Drill 1 (Fig 4):
Pose stance
This to be practised as a static pose, held for up to 30 seconds. It requires good postural control; no support is allowed. The idea is to challenge the mechanoreceptors in the joints and soft tissues to provide feedback to the brain regarding joint position and muscle tone.
It is the basic position to hold and to practise balance
The use of a mirror is recommended
Shoulder, hip and ankle should always be vertically aligned
Point of contact with the ground is always the midfoot
Hip is always held over the support point, which is the midfoot
Drill 2: Change of support without moving
Shift centre of gravity sideways from one leg to the other, maintaining support on the midfoot
You must feel the weight shift from one leg to the other before pulling up
It is important to feel the weight shift and then the acceleration of this movement by the pulling-up of the hamstring
Pull the ankle up vertically under the hip using the hamstring only, not hip flexors or quadriceps
Allow the leg to drop to the ground – do not drive it down
Mental focus is on the pulling-up action, not the leg drop
Drill 3 (Fig 5): Pony
This practises changing support using minimum effort and minimal range of movement
Simultaneously lift the ankle of the support leg while allowing your body weight to shift to the other leg
Use only the hamstring
Keep in mind your support point on the midfoot (toes will also be in contact).
Drill 4 (Fig 6): Forward change of support
This puts the pony into action; practise slowly at first
Lean slightly forward and simultaneously pull the ankle up under the hip using the hamstring and allow the non-support leg to drop to the ground under the force of gravity
Make sure the weight transfer is effortless and that the foot is allowed to fall
Drill 5 (Fig 7): Foot tapping
Single-leg drill, 10-15 taps per set
This emphasises the vertical leg action and use of hamstrings rather than driving the knees up and forward using your hip flexors and quads
It prevents your foot from being too far out in front of the body, which would cause you to land on your heel and create a braking action
Aim for rapid firing of the hamstring, lifting the foot from the ground as soon as it touches down
You must feel the muscles fire and then relax. Avoid a forceful pull all the way up. If you are doing it correctly the lower leg will decelerate after the initial firing and accelerate as gravity returns it to the ground
Drill 6 (Fig 8): Hopping
This movement progresses the tapping drill. The momentum for the hopping support leg should come from the hamstring action on the non-hopping leg. Take care: this is an advanced movement which will place unhealthy stress on structures such as the Achilles/calf muscles if not performed correctly.
Start by pulling up the nonhopping leg with your hamstring and use the reaction force of the ground to aid this recoil effect
Do not push with the calf but just lift the ankle with the hamstring and make sure the ankle is relaxed between hops
Drill 7: Front lunge
Single-leg drill which increases the range of movement of the hopping drill
This truly forces you to isolate the hamstring muscles
Practise initially on the spot until you are stable enough to allow forward movement
Keep weight on front leg; the back leg drags behind
Pull ankle vertically up under the hip, using the hamstring
Keep contact time with the ground as short as possible
Allow rear leg to follow loosely
Remember to land on the ball of your foot
Forward movement is created not by pushing off but by leaning forward from the hips. You drag the rear leg behind you for balance
Drill 8 (Fig 9): Switch
Both ankles are being picked up
This time you are picking the rear leg up as well with the hamstring
Transfer weight from one leg to the other as you alternate support
Keep contact time with the ground to a minimum, only as necessary to change support
Keep heels off the ground and land on the balls of your feet
Always think of the pose stance: good vertical alignment of shoulder, hip and foot
Drill 9: Running lunge
This is pose running, but with a deliberate emphasis on the speed of the hamstring pull-up
The aim is to teach the working leg to react as quickly as possible, minimising support time on the ground
The runner pulls the heel up vertically from the ground but allows it to fall easily to the ground
Case study: shin pain on return to training
A recreational runner came to me with bilateral medial shin pain. He was training to raise his fitness levels in order to be accepted into the Royal Air Force in the United Kingdom. He used to do a lot of distance running, including half marathons, but in the past three years work commitments had forced him to cut right down. Recently he had resumed his runs, at three times a week for 40 minutes, on a flat grassy surface, and had found he was developing shin pain.
Does this sound familiar? We all have patients who are attempting activities which they have been able to do in the past, in the belief that they are as strong and balanced as they used to be. This runner had rigid orthotics which he wore in every pair of shoes and had typical muscular tightness and weakness around the pelvis, restricted hip flexor length and reduced gluteal stability control when challenged on one leg. He had little balance control in single-leg stance, even without any extra challenge from added knee or ankle movement.
My client had already had some treatment, which concentrated on stretching and lengthening soft tissue around the shin and ankle, and improving proximal pelvic control. This had reduced but not banished his symptoms. We decided he should try running pose style. I set the runner a series of drills to increase his awareness of picking his foot up from the ground by using the hamstring, and not pounding the foot into the ground. We also worked on postural control, to improve the vertical alignment of his pelvis, shoulders and foot as he was running.
He responded to the idea that he should try to minimise the time he was spending in the support phase, by thinking of pulling his foot from the ground and letting gravity provide the impetus for forward movement. I asked him to perform the drills at home, using a mirror for feedback, for one week before returning to running.
The patient responded well to this concept and was able to build up to his previous distance, incorporating his improved technique, within three weeks. He had perfected the technique within a month, but subsequently had to keep on fine-tuning it with drills. His shin pain disappeared completely. Was it the proprioceptive drills that helped him or the feeling of not pounding the ground?
Further reading
Pose Method of Running by Nicholas Romanov (2002), PoseTech Press ISBN: 0-9725537-6-2
‘Reduced Eccentric Loading of the Knee with the Pose Running Method’, Arendse, Regan E.(1 ); Noakes, Timothy D.(1 ); Azevedo, Liane B.(1 ); Romanov, Nicholas (1 ); Schwellnus, Martin P.(1 ); Fletcher, Graham(2) in Medicine & Science in Sports & Exercise: Volume 36(2) February 2004 pp 272-277.
1. MRC/UCT Exercise Science and Sports Medicine Research Unit, Department of Human Biology, Faculty of Health Sciences, University of Cape Town, South Africa.
2. University College of the Fraser Valley, British Columbia, Canada.
https://www.facebook.com/LandSurfingFrugan